Get 50% off on Custom PC
How to Build your PC
How to Build Your PC: A Step-by-Step Guide
Building your own PC can be a rewarding and empowering experience. Not only do you get to tailor your system to your specific needs—whether it’s for gaming, content creation, or everyday tasks—but you also gain a deeper understanding of how computers work. In this guide, we’ll walk you through every essential component, from selecting your parts to assembling them into a fully functional machine.
What You’ll Need:
Before diving into the build, you’ll need the following components:
- Central Processing Unit (CPU)
- Motherboard
- Random Access Memory (RAM)
- Graphics Processing Unit (GPU)
- Storage (HDD/SSD)
- Power Supply Unit (PSU)
- Computer Case (Chassis)
- Cooling System (Air or Liquid)
- Optical Drive (Optional)
- Operating System (OS)
Step 1: Choosing Your Components
1. CPU (Central Processing Unit)
The CPU is the brain of your computer. It executes instructions and processes data. When selecting a CPU, consider performance, compatibility with the motherboard, and your specific needs. Popular choices include Intel and AMD processors.
- Intel: Known for high single-core performance, often favored for gaming and high-frequency tasks.
- AMD: Offers multi-core performance at competitive prices, making them a great choice for productivity and multitasking.
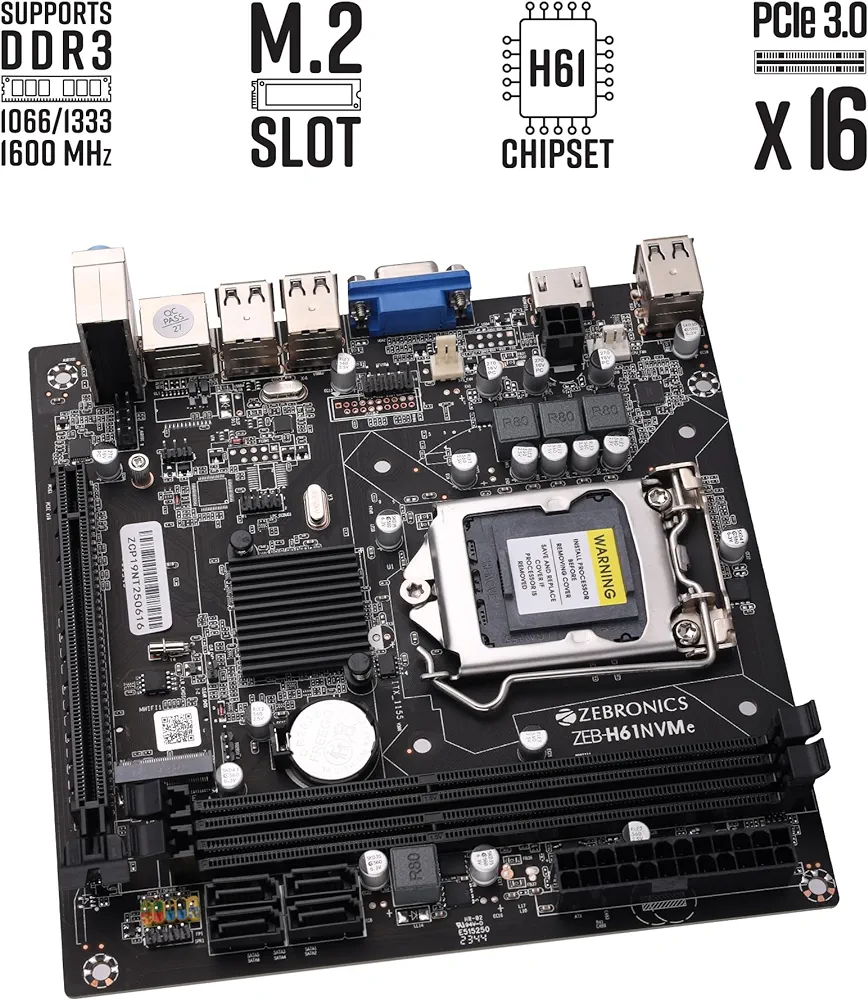
2. Motherboard
The motherboard is the backbone of your system, connecting all the components. When selecting a motherboard, make sure it’s compatible with your CPU (socket type), has enough RAM slots, and supports all the features you need (e.g., USB ports, Wi-Fi, PCIe slots).
- ATX: Standard size for most builds.
- Micro-ATX: Smaller form factor, ideal for compact builds.
- Mini-ITX: Very compact, best for small form-factor PCs.
3. RAM (Random Access Memory)
RAM is your computer’s short-term memory. It stores data that the CPU is actively working on. More RAM means better multitasking and performance. For most users, 16GB is a good starting point, while 32GB or more may be needed for high-end gaming, video editing, or 3D rendering.
- DDR4 is the most common type of RAM, with DDR5 becoming more popular in newer builds.
4. GPU (Graphics Processing Unit)
The GPU is responsible for rendering images, video, and animations. If you plan on gaming, video editing, or doing 3D work, a dedicated GPU is essential. For gaming builds, choose a powerful GPU like NVIDIA GeForce or AMD Radeon. The choice of GPU depends on your budget and performance requirements.
- NVIDIA: Known for excellent performance and support for technologies like Ray Tracing and DLSS.
- AMD: Offers great value, especially for budget-conscious builds.
5. Storage: SSD and HDD
Storage is where your data, files, and operating system are kept.
- SSD (Solid State Drive): Faster than traditional hard drives, offering quicker load times and better overall performance. Aim for at least a 500GB or 1TB SSD for your OS and key applications.
- HDD (Hard Disk Drive): Larger storage capacities at a lower cost, ideal for storing large files and backups. A 1TB HDD can complement an SSD for additional storage.
6. Power Supply Unit (PSU)
The PSU provides power to your entire system. When choosing a PSU, consider its wattage, efficiency, and the quality of the brand. Aim for at least 80+ Bronze certification for efficiency.
- Wattage: Calculate your total power needs based on the components you’ve chosen. For most builds, a 500W-750W PSU will suffice.
- Modular vs. Non-Modular: Modular PSUs allow you to attach only the cables you need, improving cable management.
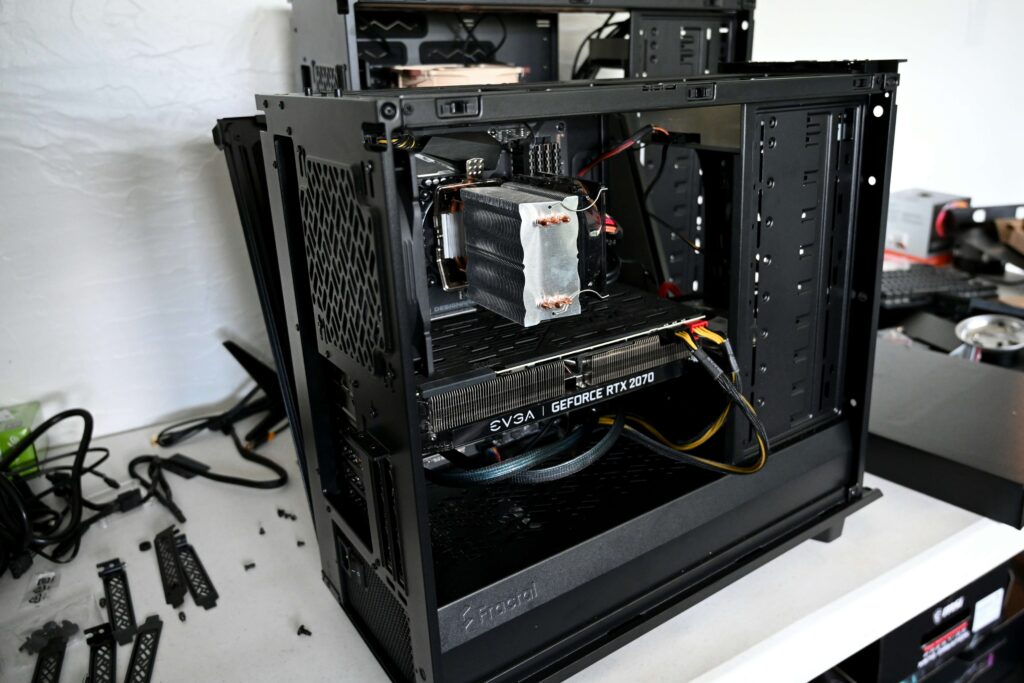
7. Computer Case (Chassis)
The case holds all your components in place and provides airflow for cooling. Choose a case that fits your motherboard size (ATX, Micro-ATX, etc.) and has enough room for your GPU and cooling system. Look for good airflow options and cable management features to keep things neat and cool.
8. Cooling System
A good cooling system prevents your PC from overheating. There are two main types:
- Air Cooling: Typically includes a heatsink and fan. More affordable but less efficient for overclocking.
- Liquid Cooling: Uses a closed loop of liquid to dissipate heat more effectively. Ideal for high-performance builds, particularly when overclocking.
Many cases come with pre-installed fans, but you might need to add extra for better airflow.
9. Optical Drive (Optional)
Optical drives (DVD/Blu-ray) are no longer as essential as they once were, but they may still be necessary if you need to read or burn physical media. Consider skipping this if you don’t need it.
10. Operating System (OS)
Once everything is assembled, you’ll need an OS to run your PC. The most common choices are:
- Windows 10/11: Best for gaming, productivity, and general use.
- Linux: Free and open-source, ideal for programming, but requires more technical knowledge.
Step 2: Assembling Your PC
1. Prepare Your Workspace
Find a clean, spacious area to work in. Make sure you have a static-free surface to prevent damaging any components. A wrist strap to prevent static buildup is recommended.
2. Install the CPU
First, open the CPU socket on the motherboard. Carefully align the CPU with the socket (there’s usually a triangle marking for proper alignment) and gently place it into the socket. Close the lever to secure the CPU.
3. Install RAM
Align the RAM sticks with the slots on the motherboard. They only fit one way, so gently press down until the clips click into place. Most motherboards have color-coded RAM slots for optimal performance, so follow those guidelines if you’re installing multiple sticks.
4. Install the CPU Cooler
If you’re using the stock cooler that came with your CPU, it should be easy to attach by placing it on top of the CPU and securing it with the included mounting system. For aftermarket coolers (air or liquid), follow the manufacturer’s installation instructions.
5. Mount the Motherboard
Place the motherboard inside the case and align it with the screw holes. Secure the motherboard with screws, ensuring it’s firmly attached. Don’t overtighten.
6. Install the PSU
Place the PSU into the designated area at the bottom or top of the case, depending on the case design. Secure it with screws, and route the power cables through the case to where they’re needed.
7. Install the Storage Drives (SSD/HDD)
Mount your SSD or HDD in the designated bays inside the case. For SSDs, use the 2.5-inch drive bays; for HDDs, use the 3.5-inch bays. Connect the power and data cables from the PSU and motherboard, respectively.
8. Install the GPU
Insert your GPU into the appropriate PCIe x16 slot on the motherboard. Secure it with screws and connect any required power cables from the PSU.
9. Connect the Front Panel
Connect the case’s front panel cables (power button, reset button, USB ports, etc.) to the motherboard. These can be tricky, so refer to your motherboard manual for precise connections.
10. Cable Management
Neatly route your cables behind the motherboard tray or use cable ties to organize them for better airflow and aesthetics.
11. Final Checks
Double-check all connections, ensuring everything is securely in place. Make sure there are no loose cables that could interfere with fans or airflow.
Step 3: Powering Up and Installing the Operating System
1. Power On Your PC
Once everything is assembled, connect your PC to a monitor, keyboard, and mouse, and plug in the PSU. Turn on the power supply and press the power button on the front of your case. If everything is connected properly, you should see the system boot up.
2. Install the Operating System
Insert a bootable USB drive with your chosen OS (Windows, Linux, etc.) and boot from it. Follow the on-screen instructions to install the OS.
3. Install Drivers and Software
Once the OS is installed, make sure to install the necessary drivers for your motherboard, GPU, and other peripherals. This ensures everything works smoothly.
Conclusion
Building a PC can seem daunting, but with the right components and a little patience, anyone can put together a powerful machine tailored to their needs. By following this guide and understanding the purpose of each component, you’ll not only enjoy a custom-built PC but also gain invaluable knowledge about how your computer functions. Happy building!